The status is a string of text (max. 161 characters), which is displayed below ones username in the contact search and in conversations. It can be written or choosen by the user themself. The status is not to be confused with the online status that shows other users whether you use the app currently. More information on the online status can be found on the page Online status.
Changing your status
In the web/desktop client
-
Click on

-
Click on

-
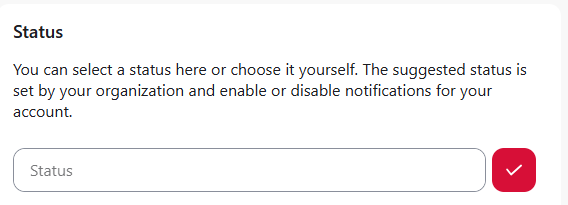
If you have not yet set a status you will see the following in the block “Status”:
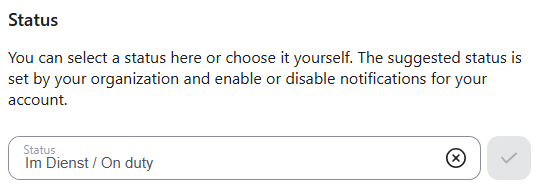
If you have already set a status you will see the following:
You can click on

-
You can set your status in two ways:
-
Write a new status message and confirm by clicking the red checkmark

-
if your administration has created status presets you can select one of the presets from the “Recommended” list below.
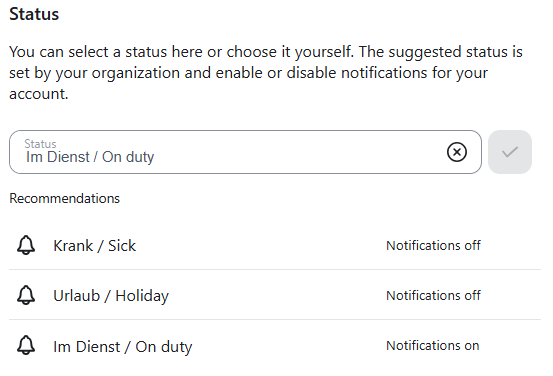
Only the statuses that are created by the administration can additionally disable notifications when set. The text on the right side of the recommended status shows whether notifications are enabled.
-
-
After confirmation you shall see the following message below.

In iOS
-
Tap on the

-
Tap on the
-
Tap on your username.
-
Tap on the input field below the term “Status”. If you already set your status, the field contains your current status, else it says “No status”.
-
You can change your status in two ways:
-
Tap on the field below the term “Current status”. The “Edit status” window opnes. Tap on the field that says “Status” and enter your desired status. Confirm by tapping the checkmark at the top right.
-
Choose one of the statuses from the list below the term “Status suggestions”. The icon on the left shows whether the status was created by you (


-
In Android
-
Tap on the
-
Tap on the
-
Tap on your username.
-
Tap on the

-
You can change your status in two ways:
-
Tap on the
-
Choose a status from the list below the term “Select status“. If the status additionally deactivates your notifications it is marked by the
Only the statuses created by your administration can additionally deactivate your notifications.
-
Create statuses for the organization as an admin
Read the article User status (Admin) | Organisationsweiten Nutzerstatus als Administrator erstellen.